4.4 What to include in your answers
The general approach is to enter your text answers and associated R chunks with code underneath each question.
TIP: It is almost always the case that you’ll need to load the tidyverse package, so it’s advisable to include an R chunk right at the beginning of your document that does this.
TIP: To insert a new code chunk, you can either: Use the shortcut: Mac = Command+Option+I; Windows = Ctrl+Alt+I. Click on the Insert a new code chunk icon. You can also specify the coding language of the chunk using the drop-down menu.
4.4.1 Code chunk headers
Here’s an example code chunk in which the tidyverse package is being loaded. You’ll notice some extra text in the header of the chunk.
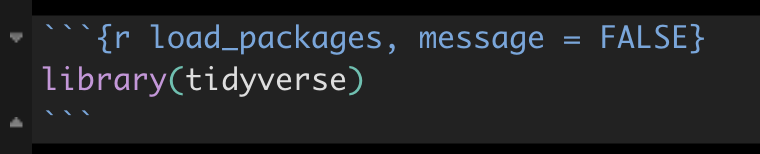
Figure 4.2: Code chunk header with message suppression
The “load_packages” text is simply giving a name or “tag” to this R chunk. It is good practice to provide a unique name to each R chunk.
After the comma is message = FALSE. This tells R markdown to NOT display any messages associated with the R commands in this chunk when knitting the R Markdown document. For example, when loading some libraries R will provide a long list of messages in the process. When you “knit” the R Markdown document, R will run each R chunk in your document. By including the message = FALSE heading argument, you can avoid including this extra output in your knitted document.
The message = FALSE header argument is NOT something to include in all chunks by default. It should only be included if the code within the associated code chunk outputs a lot of unnecessary information that would otherwise clutter your knitted PDF document.
There will be routine steps to take for each question.
4.4.2 Import data
Each assignment question will indicate which dataset(s) you’ll need to answer the question, and where to locate / download these. In many instances multiple questions will use the same dataset, in which case you don’t need to load data for each question; just load it once.
Here’s an example of code for importing data. It uses the read_csv function from the readr package, which is bundled with the tidyverse package:
example_data <- read_csv("https://raw.githubusercontent.com/ubco-biology/BIOL202/main/data/example_data.csv")The read_csv function will take as an argument a URL address for a data file. Here we’ve provided a URL for the location of a CSV file (comma-separated values file), which is typically what we’ll use.
4.4.3 Load packages
Once you’ve loaded the data, you’ll now need to figure out how to answer the question by looking through the tutorials for the answer. And typically, to answer the question you’ll need to make sure you’ve loaded some packages.
If you’ve forgotten what “packages” are, refresh your memory at this tutorial.
For example, it’s likely you’ve already loaded the tidyverse package (as advised above), but if a tutorial indicates you need another package, say the janitor package, then insert a code chunk with the following:
library(janitor)When working on your own computer, you only need to install a package once (unless you want to update an already installed package to the latest version, which is a rare event). If you’re working on a school computer (in a computer lab), you may need to install packages each time you log on to a computer, because the school computers delete local files daily. If you’re unsure what packages are already installed, consult the “packages” tab in the lower-right RStudio pane when you start up RStudio; installed packages are listed there.
4.4.4 Answer the questions
After you’ve imported the required data and loaded required packages, it’s time to answer the questions!
You simply insert any required text and R code (in R Chunks) after each question. The tutorials will provide the information required to answer the questions.
TIP: The way to test out your code once it’s inserted in the R chunk is to press the green play button at the top right of the code chunk. This will run what’s in the chunk. You’ll be provided error statements if something goes wrong. If it works, it will provide you the output (and hopefully the answer!), and this is what you use to inform your written (typed) answer.
Here’s what you need to include in your answers:
Answer each question clearly and in full sentences. Make sure you answer specifically the question asked.
Verify that the code you used to answer the question is included in an R chunk and appears in the knitted document (this should happen automatically)
Verify that the output from each R chunk is included in your knitted document (this should happen automatically)
For any figures (graphs) that you produce, you must include a figure caption. See the next section for instructions.
If you use a graph to answer a question, refer to that graph in your answer
REMINDER: As you work on your document, save frequently, and also knit your document frequently.
TIP: You will often need/want to preview the document you are working on to ensure that everything is being formatted as you expected in the knitting process. The default setting is for the preview to open in a new pop-up window outside of RStudio, although you may find it useful to have it open in the Viewer panel within RStudio itself (particularly if you’re only working with one screen!). To change the preview location, click the Settings icon in the toolbar and select the option to “Preview in Viewer Pane”.